|
Tana}nangin
i}ayuusalix an}a}iimchin a}na{txichin.
(E)
|
Scientists guess that there are more than 250,000 plant species in the world. If all plants could live everywhere, you could collect thousands of plants near your home. What a crowd!
However, you will not find a bamboo plant where you live. Nor will you find big trees. You will not find the insect-eating Venus flytraps, but you might find a relative, the sundew. You will not find coconut palms where you live (they make the some of the biggest seeds in the world). However, you will find many ferns (they don’t make seeds). Ferns are like the tropical plants that grow next to the coconut palm. Indeed, many orchids grow throughout Alaska. They are not found only in the tropics!
Why do some plants live in one place and not another? Why do few big trees grow where you live? Scientists wonder about such questions. Perhaps you will gather some reasons before you complete this study.
|
Botanists guess that more than 500 species of plants live in the Aleutians/Pribilofs. Many of those plants are not found anywhere else in the world! You have already looked at some of them. Now you will look at some places where they grow and why they grow there. You will be looking at their habitats. However, don’t expect to find all 500 of those species of plants everywhere in the Aleutians/Pribilofs. Each plant is adapted to a set of conditions. That means that some of plant species will be in one kind of habitat, and some in another. Plants that you can find near St. Paul may not be found near Unalaska. Some Unalaska plants may not be found near King Cove. King Cove plants may be different from the plants found on Atka.
|
|
|
|
|
You will be looking at little communities in the habitat that give you clues about growing conditions. You will need to ask yourself questions about where you find these plants, and why! ACTIVITY ONE. You can read about plants. Do you know any stories about plants? Do you remember hearing about plants being used for food or as medicine? You can find a story or book about plant use. Look in the library, or on the Internet. You can talk to Elders, parents or caregivers. When you find the book, plan to spend several days reading it. Your teacher will ask you to retell the story when you are finished. ACTIVITY TWO. You can collect wisely. What are the important things to remember when you are collecting plants? These are some suggestions:
Can you think of other guidelines?
|
|
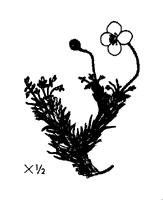
“Arctic poppy is the ‘rain flower’ on St. Paul Island. My mother said, ‘Don’t pick them, or walk on them, or it will rain. They don’t smell good, anyway.’ But it was a pretty flower. One time when we were picking berries, we picked the flower in spite of what mother had said, and then it sprinkled.” Mary
Bourdukofsky, |
These are some of the plants known as “rain flower” in this region. Do you know any stories about how a flower got its name?
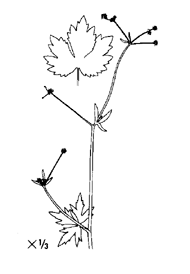
Ranunculus
bongardi |
|
|
Papaver
alaskanum |
Claytonia
sibirica |
|
|
In Unangam tunuu words [r] = Russian loan word. chi}uudgni{
E (UT 139) (chih GOOTHE ngeh): flower
tuguma{ E (UT 402) (toogh OOM ah): beach
chiimluuda{ E (UT 142) (cheem LOO thah): field (meadow)
chaaska{ E (UT 132) (CHAAHS kah): cup changana{ (UT 131) (chung AHN uh): valley chid}aayu(m) tuduu E (UT 401) (chithe GUY yoo(m) • too THUU): purple uluudam qaxchikdaa W (Dirks, 2001) (oo LOO thum • kagh CHIK thaah): purple
chi{il}i{ E (UT138) (chih HIL gheh): bog
chuguul}un E (UT 152)
(choo GHOOL ghun): gravel chugu{ (UT 151) (CHEUGH oh): sand chumnugi{ (UT 153) (choom NUH gegh): yellow kanuuya{ [r] (UT 230) (ka NOO yah): orange lista{ [r] (UT 256) (LEE stuh): petal
qii}uusi{ E (UT 238) (keoh GHOO segh): mountain
quma{ E (UT 335) (KOO mah): white siriivra{ W [r] (UT 360) (sir EEV rah): silver
slu{ (UT 368 #3) (SLOOH): habitat
suulutu{ E [r] (UT 377) (SOO luh toh): gold
tal}in E (UT 386) (TAHL
ghin): branches uluudam tudagii W (UT 401) (oo LOO thum • too THAG ee): pink uluuda{ (UT 436) (oo LOO thah): red
|
|
|
|
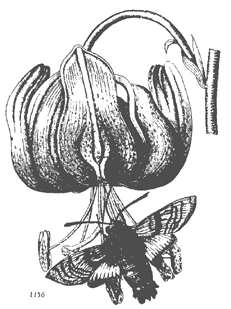
Why are many flowers brightly colored? Brightly colored flowers are nature’s advertisements to insects that some good food is here. Insects, attracted by the flower’s color and aroma, land to get a meal. As the insect looks for the sweet nectar, it also picks up the tiny pollen grains that are the flower’s male reproductive cells. Then the insect flies on to another flower where some of these male grains stick to the female part of the flower, helping the plant make a new generation. Many flowers need insects as much as insects need flowers. |
ACTIVITY THREE.
You can make a collection of plant specimens that will help other people identify the plants in your area. This kind of collection is called a herbarium.
Before you visit the habitat area, make some guesses—predictions. Which plants do you think you will find in each of these habitats: a meadow (field), beach, bog, sheltered valley, and exposed mountain? Which plants will you find in the greatest quantity in any of these habitats? Which plants will be the fewest in quantity? Record these predictions with your class on large paper. After you visit each habitat, compare your predictions with what you actually found.
You will be organized into groups based on flower colors for these activities. What is the Unangam Tunuu word for your team’s color?
ACTIVITY THREE-A. You can learn about plant communities called habitats.
You will need:
- something to make a frame on the ground such as a hula hoop, or a length of string and pencils to hold the corners
- Habitat Record Sheet
- outdoor weather thermometer
- directional compass
- log book
- pens, pencils
- camera (optional)
In the habitat area, organize into your color group teams. Working with your team, use a frame to outline an area approximately 3 feet (one meter) square. What plants are inside that area? With your team, complete a Habitat Record Sheet.
|
HABITAT RECORD SHEET Record this information for the plants you observe inside your habitat frame. a. Circle the type of habitat: meadow (field), beach, bog, sheltered valley, exposed mountain, other (describe) ____________________________________ b. The date is: ____________________________________ c. Identify the plants you know already.
d. Give yourself identifying clues about the plants you do not know, and then include them also. Make notes about their characteristics so that you can research the plant name. Count how many of each plant you find inside your border.
e. How many different species total do you find inside the habitat frame? ________________
Which species has the most plants in this frame? __________________________________
Which species has the second-most number of plants inside the frame? __________________ f. Many ingredients create a plant’s habitat. What are some of the characteristics of the small place where your plants live? Ask yourself these HABITAT QUESTIONS and record the observation answers. LOCATION:
WATER:
LIGHT and WEATHER:
SOIL: What made the soils here? (you may need to select several of these)
VARIETY:
g. Draw a “map” of the area inside your frame showing the location of your plants. (see the sample map for ideas) Note any nearby landforms such as streams or cliffs. Using a compass, find the directions for north, south, east and west. Mark these directions on your map. Attach your map to the Record. h. Photograph the plants and the habitat for comparison later in the season or school year. Mount your photographs on pages with this Record. |
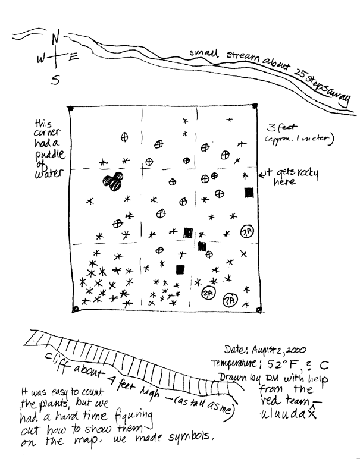 |
Sample Map for Habitat Record
|
ACTIVITY Three-B: You can look at seeds.
You will need:
- log book
- pens, pencils
- tweezers
- cup of water
- stuffed animal toy
- Seed Test Card
- hand lens
It’s time to look for some seeds in the habitat. Find a seed and pick it up with your tweezers. How do you know it is a seed? What is your evidence? Observe the seed with a hand lens and describe what you see. Hold the seed against a plain background if you need a better view. Sketch at least 3 different kinds of seeds in your log book. Using the Seed Test Card, look for the ways the seed travels. Describe these in your log book. Record any questions you have about the seeds.
Later, you will also collect seeds for an experiment and language/art project. Seeds are best collected in the fall. If you are collecting in the spring, don’t be too disappointed if you find only a few samples.
|
Geranium
erianthum |
The
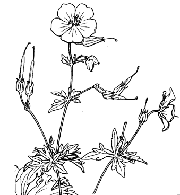
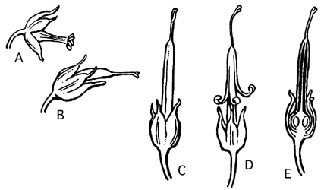
wild geranium has a seed pod like a bird beak that splits, curls,
and “throws” the seeds of the plant. |
ACTIVITY THREE-C. You can collect specimens for the Class Herbarium.
You will need:
- plastic bags that close such as large zip-loc bags or bags with twisties.
- masking tape for field labels
- waterproof marking pen
- camera, video camera (optional)
- log book
- pens, pencils
- set of Plant Illustration Cards
What should your team remember while collecting specimens for the Class Herbarium?
- Limit your collection to 2 specimens each.
- Leave some plants behind to re-populate the species so that you and others may have the pleasure of seeing the plant again.
- Collect plants that match your color group.
- You may wish to photograph or video tape the plant in its habitat before you collect it. It will help you later if you make a key for your pictures now.
- The Plant Illustration Cards may help you make a field identification of the plant.
- Carefully put each specimen in a plastic bag.
-
When you collect each specimen, record the basic collection information
on a piece of masking tape. Write the same information in your log book:
- date
- collection number. If this is the first plant collected today, write down the numeral 1. For the second plant collected, write down 2. Continue numbering your specimens in order every time you collect so you can keep accurate records.
- team name
- collector’s initials
- location
- plant name if known
- Attach the masking tape label to the specimen bag.
- Make the bag puffy with air to protect the specimen.
- Close the specimen bag.
- Carefully carry your collected specimens back to the classroom in the closed plastic bags.
You will need to open the bags when you return to the classroom so that the specimens do not mold. Set each specimen in the plant press before you leave school for the day.
ACTIVITY FOUR. You can identify your plant specimens.
You will need:
- plant field guides
- hand lens
- log book
- pen, pencil
- specimens
- Plant Information Cards
- computer
- Using one or more plant field guides, identify your specimens.
- Fill out an identification card for each specimen. Record the information on the computer. You may also have information from Elders and other experts to include. You may want to add more information later about plant uses after you interview Elders and experts.
- Put the plant in the press if it still needs drying.
|
Plant Information Card Technical/scientific
name: _____________________________________________ |
|
ACTIVITY FIVE. You can press your plants. You will need:
Press your plant using the method your teacher describes. If a specimen is bigger than your press, don’t let it hang out over the edges. Fold it into a W, N, Z, or V like the one shown for the Iris Setosa. Write your initials and the collection number on a piece of paper by the drying plant. Sometimes plants change appearance as they dry. Your initials and collection number will help you know it’s your specimen. |
|
|
|
|
ACTIVITY SIX. You can make a Class Herbarium. When your pressed plants are completely dry, it is time to mount them on herbarium pages. Touch your plant gently with your finger. If your plant is ready, it should feel like dry paper. Depending on the pressing technique you used, this activity may begin several days or weeks after you began pressing.
|
EXTENSIONS
ACTIVITY A.
With a partner, sort the Plant Illustration Cards into groups with similar flowers in each group. List the reasons why you have made these groups.
ACTIVITY B.
Using the Plant Illustration Cards, invent a game for your class.
ACTIVITY C.
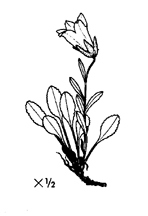
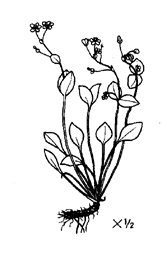
The Plant Illustration Cards from Flora of Alaska and Neighboring Territories, by Eric Hultén, tell you how big the collected specimen was. For example, the drawing of this bluebell is x1/2 (see right). With a ruler, measure the drawing of the bluebell. It is about 2.5 inches (63.5 mm) To find the plant’s actual size, multiply by 2. (That comes from the 2 in the 1/2). How big was the collected specimen? (Use a mirror to read the answer below.)
![]()
|
You can learn how big all the collected plants were on the Plant Illustration Cards. If you have an enlarging copier, you can also calculate how much bigger you would need to make a copy of the card to have a full-size drawing of the plant. Illustrations from Flora of Alaska and Neighboring Terrritories by Eric Hultén (c) 1968 by the Board of Trustees of the Leland Stanford Junior University were reproduced with the permission of the publishers, Stanford University Press. Further reproduction of the material requires the publishers’ permission. (http://www.sup.org)
|
|
Campanula
chamissonis
|
| Student
Assessment, Section Two |
Name: ____________________________ | ||
| Date: __________________ | 1. Always | 2. Sometimes | 3. Never |
|
I
stayed on task.
|
|||
|
I
completed my work.
|
|||
|
I
asked questions.
|
|||
|
I
contributed to my group's work.
|
|||
|
I
understand the information.
|
|||
|
I
am respectful of Elders and experts
|
|||
|
I still have questions about:
|
|||

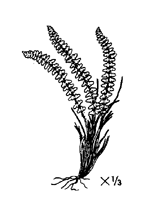
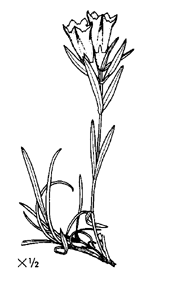
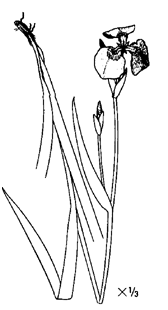 When
this plant was pressed, its stem was bent into a V to fit into
the press. When you press very long specimens, bend them in
sharp corners like a V or W or N or Z. Gentle curves are not
wanted for plant specimens. They make it hard to measure the
dried plant.